Sep 15, 2011

Close encounters... of the spray foam kind.

When it was time for us to insulate our house we decided to go with the relatively newer technique of spray foam insulation instead of batted (pink fiberglass) insulation. There were several reasons for this decision. Spray foam has the same R-value per inch as pink fiber glass. The difference between the two is air infiltration. Air will move through fiberglass insulation, carrying with it hot or cold air molecules that will leak into your house. Spray foam on the other hand does not allow air infiltration and creates a complete thermal barrier between the inside and outside of the house.


This is a picture of the trailer the company showed up with. They had their own generator which was a plus for us since at the time we did not have enough power in the house to run the equipment needed. The insulation is a two part mix, each in separate 55 gallon drums in the trailer. They are pumped separately through the hose you see here and mixed together at the spray nozzle.


This is the nozzle that's used to spray the foam.


The installer was dressed like he was from outer space. He had to wear protective gear while spraying the foam. Here he is in a head to toe suit and a self contained breathing apparatus. The fumes from the foam were pretty strong and we were advised to stay out of the house as much as possible since we were not protected.


Starting at the bottom while moving the nozzle in a back and forth motion the foam was sprayed into each joist bay. In a matter of seconds the foam began to expand until it covered the entire area.


It is somewhat difficult to control how much the foam expands so he had to go back over certain areas until it reached the correct depth.


Once the foam was dry, the excess was sawed off flush to the joists to ensure that drywall can be hung properly. You're supposed to use a long fine tooth saw blade that bridges between the joists but this guy decided to use an old hand saw. Needless to say we had them redo some sections of the house because the hand saw cut away too much foam, leaving voids where foam should be.


Here is the front of the house upstairs with all the roof joists complete. This stuff makes quite a mess!


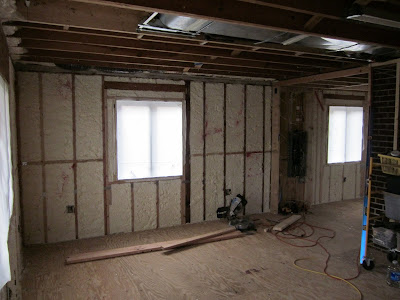
Once all the electrical work was done the insulation company came back to spray foam all the exterior walls. After they were done Kevin spray painted the sections that required additional insulation because of the way it was trimmed. We were not too pleased that they also managed to cut several of our electrical wires while trimming the foam.

Kevin had to remove some of the foam and re-pull the wires all the way back to the electrical panel.


The next several pictures are different rooms around the house. This is the master bedroom.


Here is the bedroom upstairs. 


This is the other side of the upstairs bedroom.


The living room.


The master bathroom.


The office upstairs.


We also added some fiberglass insulation on a few interior walls. We did this to keep normal household noise out of the bedroom in case someone was sleeping. This is the wall that separates the master bedroom/walk-in closet from the master bathroom.


Here is the wall separating the master bedroom from the living room. All-in-all we are very pleased with our decision to go with the spray foam insulation. It was really neat to watch it being installed and it's a great product.  Unfortunately we are not very pleased with the way the installation went the second time but like most things... se la vie. We're one step closer to being finished!

Sep 10, 2011

HVAC is back!

The HVAC system that was in our house many moons ago was a piece of junk! We tossed it almost immediately. During the bitter cold winter months we stayed warm by using a 55 gallon drum converted into a wood stove. Much of the house's old material was burned for heat and it saved us many trips to the dump. We also got to pretend we were hobos!  As winter turned to spring and eventually summer we really had no choice but to grin and bear it. Now the HVAC is back and better than ever!


There are some things we are just not qualified to do... and installing a heating and air conditioning system is one of those things. So, we hired this out to Ray and (with his as always) Garth from the John G. Webster Company. Yes that was a Wayne's World reference! After Garth designed the ducting system to ensure the proper flow of air to each room, the actual equipment started showing up. Here you can see the high eficiency gas furnace (left) and the AC coil (right) before it was installed.


As you all probably know by now, one of our goals has been to make this house as energy efficient as possible. One of the things we have done is insulate the house with expanding spray foam – no more of that pink fiberglass insulation for us! A side effect of spray foaming a house is that the foam completely air seals the house. A “normal” house breathes (read: leaks air) which allows for something called “air exchange rate”. Quite simply, this is a number that quantifies how many times per hour all the air in your house leaks out and is replaced by fresh air from outside. Sounds bad (and it is from an energy efficiency standpoint) however this is what allows you NOT to be breathing stale air all the time. So…long story short….the piece of equipment pictured below is called an ERV (Energy Recovery Ventilator) and runs in conjunction with the HVAC system to pull in air from outside and exhaust stale air from inside, since a spray foamed house like ours will not do this automatically through leakage.


Here is a diagram to show you how an ERV works:


The furnace and air handler were installed horizontally under the eve on the second floor to keep them out of our way. The house isn’t huge so this saved us a bunch of floor space. Here you can see the pan that goes under the furnace/air handler assembly that will catch any water, should it ever leak. After it was installed the guys attached a emergency shut off sensor that detects water in the pan and shuts the whole system down so the pan can't overflow and damage your house.


In an HVAC system you need to have both high and low air returns to cycle air that needs to be either re-heated or re-cooled, depending on the season, back to the furnace/air handler. Below is the smaller downstairs return that will pull cold air that has sunk to the floor back up for reconditioning.


 This picture is the high air return which is located at the top of the stairs. This will catch all the warm air that has risen to the ceiling and send it back to the AC system to be re-cooled.


Here you can see one of the registers in the upstairs bedroom before they connected the supply ductwork to it.


Here is the connected ductwork to one of the bedroom registers.


This is the main trunk that distributes air to most of the registers on the back of the house.


Here is the register in the kitchen.


Here is the furnace and the air handler all installed. Furnace is on the left and the air handler (which contains the AC coil that cools the air as it blows across) is on the right.


Here is the ERV all hooked up with its supply and exhaust ductwork. This will keep us supplied with fresh air without losing efficiency.


Our AC condensing unit sits right on the end of the house. You can see the refrigerant lines running up the side of the house, feeding right to the coil inside the air handler and cooling our house! We still have to move the electrical fuse box (the grey box mounted to the wall). Apparently, according to the “Code God” it is not “accessible” where it is but if we move it six inches to the left then everything will be fine. These people never fail to amaze us with their blatant disrespect for logic and insistence on “the book” which apparently was written by accident prone midgets who are incapable of reaching this box.

Sep 5, 2011

"It's electric... boogie woogie woogie!"

It's time to display our wonderful electrical panel now that all the wiring in the house is done. I don't want to post a ton of confusing pictures of wire running everywhere and electrical boxes nailed to the studs. Instead I figured I just tell you that Kevin busted his butt pulling every wire (with mine and his dad's help of course) and wired every outlet, light fixture, flood light, and breaker into the panel. We spent a long time working with several different types of wire, making sure they were run properly and secure. All the regular wall outlets are on 20 amp breakers and run with 12-2 wire (12 gauge-2 conductor + ground) while the light circuits are all on 15 amp breakers run with 14-2 wire. And, as you can see, all these circuits terminate neatly at the new 200 amp panel.